Keto Chocolate Cake

Comment

Keto Chocolate Cake

Chocolate Keto Cake Recipe

This weekend was my friend’s birthday, I am a big believer of giving experiences rather than material possessions. So I decided to bake a cake, but the thing was my friend is KETO. That means no refined grains, sugar, and high fat. I took the challenge to bake him a chocolate keto cake and it was a huge success! Here is the recipe! ENJOY

Keto Cake Recipe


Calories: 252 Calories
Total Carbs (including erythritol): 22.4g
Fiber: 2.4g
Erythritol: 15g
Net Carbs: 5g
Protein: 5.9g
Fat: 22.7g

INGREDIENTS: ( CAKE)

  • 2 cups blanched finely ground almond flour

  • 1 cup granular erythritol, or preferred sweetener ( I used Swerve)

  • 1/2 cup unsweetened cocoa powder/ raw cacao powder

  • 1 tsp baking powder

  • 1/2 cup butter, softened

  • 1 tsp vanilla extract

  • 2 eggs

  • 1 cup unsweetened almond milk

FROSTING:

  • 8 oz Miyoko’s vegan cream cheese, softened ( Coconut Based)

  • 1/2 cup grass fed butter, softened

  • 1 cup powdered erythritol ( I used Swerve)

  • 1 tsp vanilla extract

  • 3 tbsp unsweetened cocoa powder/raw cacao powder

  • 2 tbsp heavy almond /coconut based creamer

OPTIONAL:

  • I chopped up Lily's Chocolate Chips (for sprinkling around top for decor)

  • added fresh raspberries, coconut shreds, and cacao nibs on top

INSTRUCTIONS

CAKE

  1. Preheat the oven to 400 degrees.

  2. In a large bowl, mix the almond flour, erythritol, cocoa powder, and baking powder until fully combined. Mix in the butter and vanilla. Crack open the eggs into the bowl and stir until completely combined, then stir in the almond milk.

  3. Prepare three 9-inch round cake pans. Use coconut pan spray to prevent sticking. Then evenly pour batter between three pans.

  4. Place the pans into the oven and bake for 25-30 minutes(ovens vary) until a toothpick comes out clean.

  5. Let cool completely before frosting, add topping, keep refrigerated before serving

FROSTING

  1. In a large bowl, whip all ingredients together until fluffy, 3-5 minutes.

  2. To assemble: add frosting on to cake, and decorate to your liking

  3. Add your favorite toppings


Comment

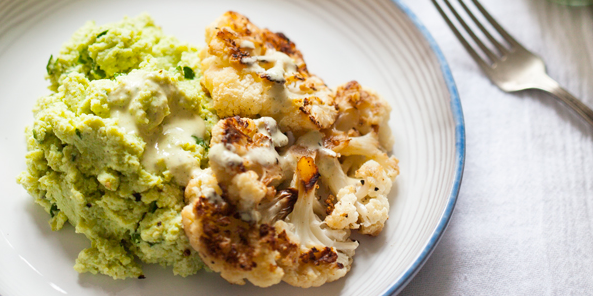
Edamame Garlic Mash - Perfect Side Dish

Comment

Edamame Garlic Mash - Perfect Side Dish

charleschen.tv

The perfect healthy side dish, to switch it up from your traditional mash potatoes. Less calories and more fiber too! Super tasty, not to mention the added pop of color!

INGREDIENTS: 

  • 1 Head Cauliflower

  • 1 Tablespoon of butter

  • 1 heaping T sour cream

  • Salt and freshly cracked pepper

  • 1 minced garlic

  • 1 T wasabi powder or paste (and more to taste)

  • ½ C frozen, Shelled edamame (or 1 very generous cup of in-shell frozen edamame)

  • 1 teaspoon of umami powder

INSTRUCTIONS:

  • Core cauliflower of leaves and thicker stems and cut into large chunks or break into florets.

    Put cauliflower in a large pot, with water to cover and add edamame. Heat over medium heat until boiling, cover, and boil until cauliflower is fork tender, about 15 minutes. Note: The cauliflower needs to be soft enough to mash, not tender as you would want with steamed veggies.

    Transfer the veggies into a colander or strainer, and let strain until as much of the water has drained.

    If you are using shelled edamame: strain the cooked veg and wait until it’s cool enough to touch. Then de-shell the edamame, discarding the pods.

    Return veggies back to the pot and mash. I find using a masher works well, but you can use a food processor or hand blender if you would like. Depending on how much liquid is still left in your mash, you might need to reduce on the stove by heating on low or medium until it’s to a temperature and texture that you like. I usually aim for smoother than a thick mash but not runny like a puree. Add your wasabi powder or paste, butter and sour cream

CharlesChen.tv
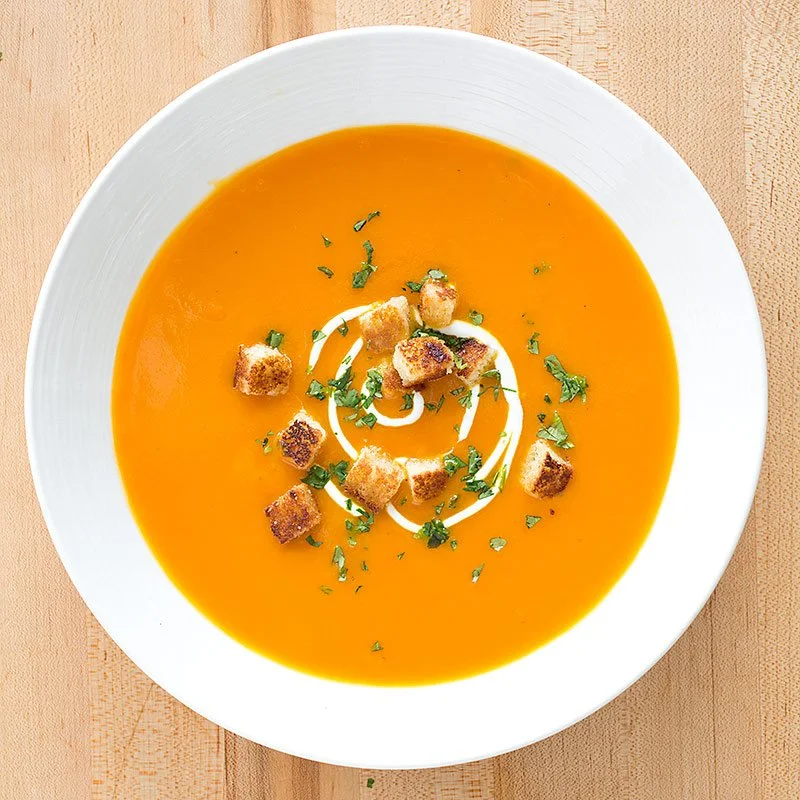
Butternut Squash Soup Recipe

Comment

Lunar New Year Dumplings

Comment

Lunar New Year Dumplings

paleo potstickers

Our family grew up eating these potstickers, I swap out some ingredients to make these paleo friendly! Stories were always passed down while wrapping these potstickers! Definitely a hit for the family or gatherings

INGREDIENTS:

Filling:

1 pound Napa cabbage, about 1 small head
1 Tablespoon kosher salt
1 pound ground pork
1/4 cup chicken broth
3 large shiitake mushrooms, stems discarded, caps finely chopped
1/2 cup minced scallions
1 Tablespoon minced fresh garlic
1/2 Teaspoon ground ginger
1/2 Teaspoon ground white pepper
1 Tablespoon coconut aminos
1 Teaspoon toasted sesame oil

Wrappers:
3 cups (384 g) cassava flour
3/4 cup (96g) arrowroot powder
1 1/2 teaspoons Diamond Crystal kosher salt
2 1/4 cups boiling water
For Cooking the Potstickers:

1/4 cup avocado oil, divided (or grapeseed oil)
1/2 cup boiling water per panful of dumplings
Dipping Sauce:
Soy Sauce , Ponzu, Optional add Chili Paste


INSTRUCTIONS:
For the filling:
1. Finely chop the Napa cabbage leaves, place in a medium bowl and toss with the salt. Place the mixture in a fine mesh colander over a bowl and let sit for about 30 minutes at room temperature. Press the cabbage to release the liquid, then put cabbage in a cloth towel and squeeze out the rest of the liquid. There should be about 1 cup of cabbage remaining. Set aside.
2. In a large bowl, add the pork and the chicken broth. Mix with a fork or your hands to incorporate the broth into the meat. Add the cabbage, mushrooms, scallions, garlic, ginger, white pepper, coconut aminos, and sesame oil. Mix well with hands until everything is combined into a slightly sticky ball. 
3. Cover and refrigerate the filling mixture until ready to use, or for up to two days.

To Assemble the Potstickers:
1. On a large baking sheet, divide the pork filling into 48 equal parts (about a scant tablespoon).
2. Roll out each potsticker ball in between two sheets of parchment paper with a rolling pin until about 1/8” thick (or use a tortilla press if you have one). Add the filling, slightly spreading it out lengthwise, and fold up the sides. Press the tops together, and then crimp them along the top to form the traditional dumpling shape. The finished potsticker should have a flat bottom with a pleated top that is then shaped into a crescent form. Repeat for all 48 potstickers. 
3. Heat up a 10” heavy bottomed frying pan on medium heat; add the oil. When it is hot, place the potstickers around the pan so they do not touch each other. Fry the bottoms until they are brown and crispy, about 2 minutes. 
4. While the potstickers are browning, heat 1/2 cup of water to a boil. When the potstickers are browned on the bottom, CAREFULLY add the boiling water to the frying pan, turn down the heat, and cover with a lid. Steam for about 5 minutes. When the timer goes off, continue cooking for a minute or two until the liquid has burned off.  Serve immediately with your choice of dipping sauce. 
5. Repeat Steps 2, 3 and 4 for as many potstickers as you want to cook. Store the extras in the freezer in a single layer in zip lock freezer bags for up to two months. Steam frozen dumplings for 7 minutes.

Comment

Benefits of Probiotics During Holidays

2 Comments

Benefits of Probiotics During Holidays

Holidays are here, and there are so many reasons why you need to be taking probiotics! Our gut is the source of our overall health, so if we take better care of it we will naturally feel better. As we are traveling during the holidays this can compromise our immune system, also as the weather changes we can also be more susceptible to colds. Below are some key benefits to why you should be taking a supplement. I like to take a dairy free version, and I take it with me wherever I travel.

Order Dairy Free Probiotics Here

BENEFITS OF TAKING PROBIOTICS:

  • boosting immune system

  • prevent and treat urinary tract infections

  • improve digestive function

  • heal inflammatory bowel conditions like IBS4

  • manage and prevent eczema in children

  • fight food-borne illnesses

  • Builds you immune system to avoid colds

  • Repopulate your gut with healthy flora after taking anti-biotics

  • treat kidney stones

  • treat colic

  • prevent cavities and gum disease

  • treat colitis and Crohn’s disease

  • combat antibiotic-resistant bacteria

  • treat liver disease

  • battle cancers

  • manage and help with autism

  • lower cholesterol

  • fight bacteria that causes ulcers

  • improve skin conditions

  • supports weight loss

Apart from taking it in supplement form, you may also get it from foods such as yogurts, kefirs, kimchi, and fermented foods.

2 Comments

BBQ Artichoke Tacos

Comment

BBQ Artichoke Tacos

BBQ TACOS by Charles Chen TV

HERE is a FUN spin on traditional tacos tuesdays, especially if you like bbq

  • 2 14-ounce cans of artichoke hearts (half canned or fresh steamed and drained)

  • 1/2 cup of black beans 

  • 1 tablespoon herb de provence 

  • 1 teaspoon apple cider vinegar

  • 1 tablespoon olive oil

  • 1/2 cup your favorite BBQ sauce 

  • 6 small gluten free tortillas

tacos on tacos

Make BBQ Slaw according to the recipe and set aside in the fridge. Next, your pan/grill to high . Drain artichokes and place into a large bowl. Add the dry rub, vinegar, and olive oil. Toss to coat. Grill artichokes for 6 minutes on both sides or until well-marked by the grill grates. Toss with the BBQ sauce & cooked black beans. Serve on tortillas with plenty of BBQ slaw. Makes 6 tacos. (Serves 2 to 4 people.)


BBQ Mango Salsa Slaw

  • 2 cups shredded purple cabbage (1/2 of a small cabbage)

  • 1 tablespoon tahini (sesame paste)

  • 1/2 cup Shredded Carrots

  • 1/2 cup Mango Salsa

  • 1/4 cup Olive Oil

  • 1/2 Avocado diced

  • 2 Tablespoon of Liquid Aminos

  • Sea salt to taste

  • Cilantro ( Optional)

  • Top with Hemp Seeds

Toss cabbage, tahini, carrots, mango salsa and BBQ Sauce until well incorporated. Add salt and pepper to taste. (Makes about 2 1/2 cups.)

Coconut Basil Sour Cream

  • 1/2 cup of coconut yogurt (unsweetend) 

  • 1 whole lime juice 

  • pinch of sea salt 

  • handful of basil 

  • drizzle maple syrup 

BLEND & ENJOY!

Comment

Taiwanese Beef Noodles

Comment

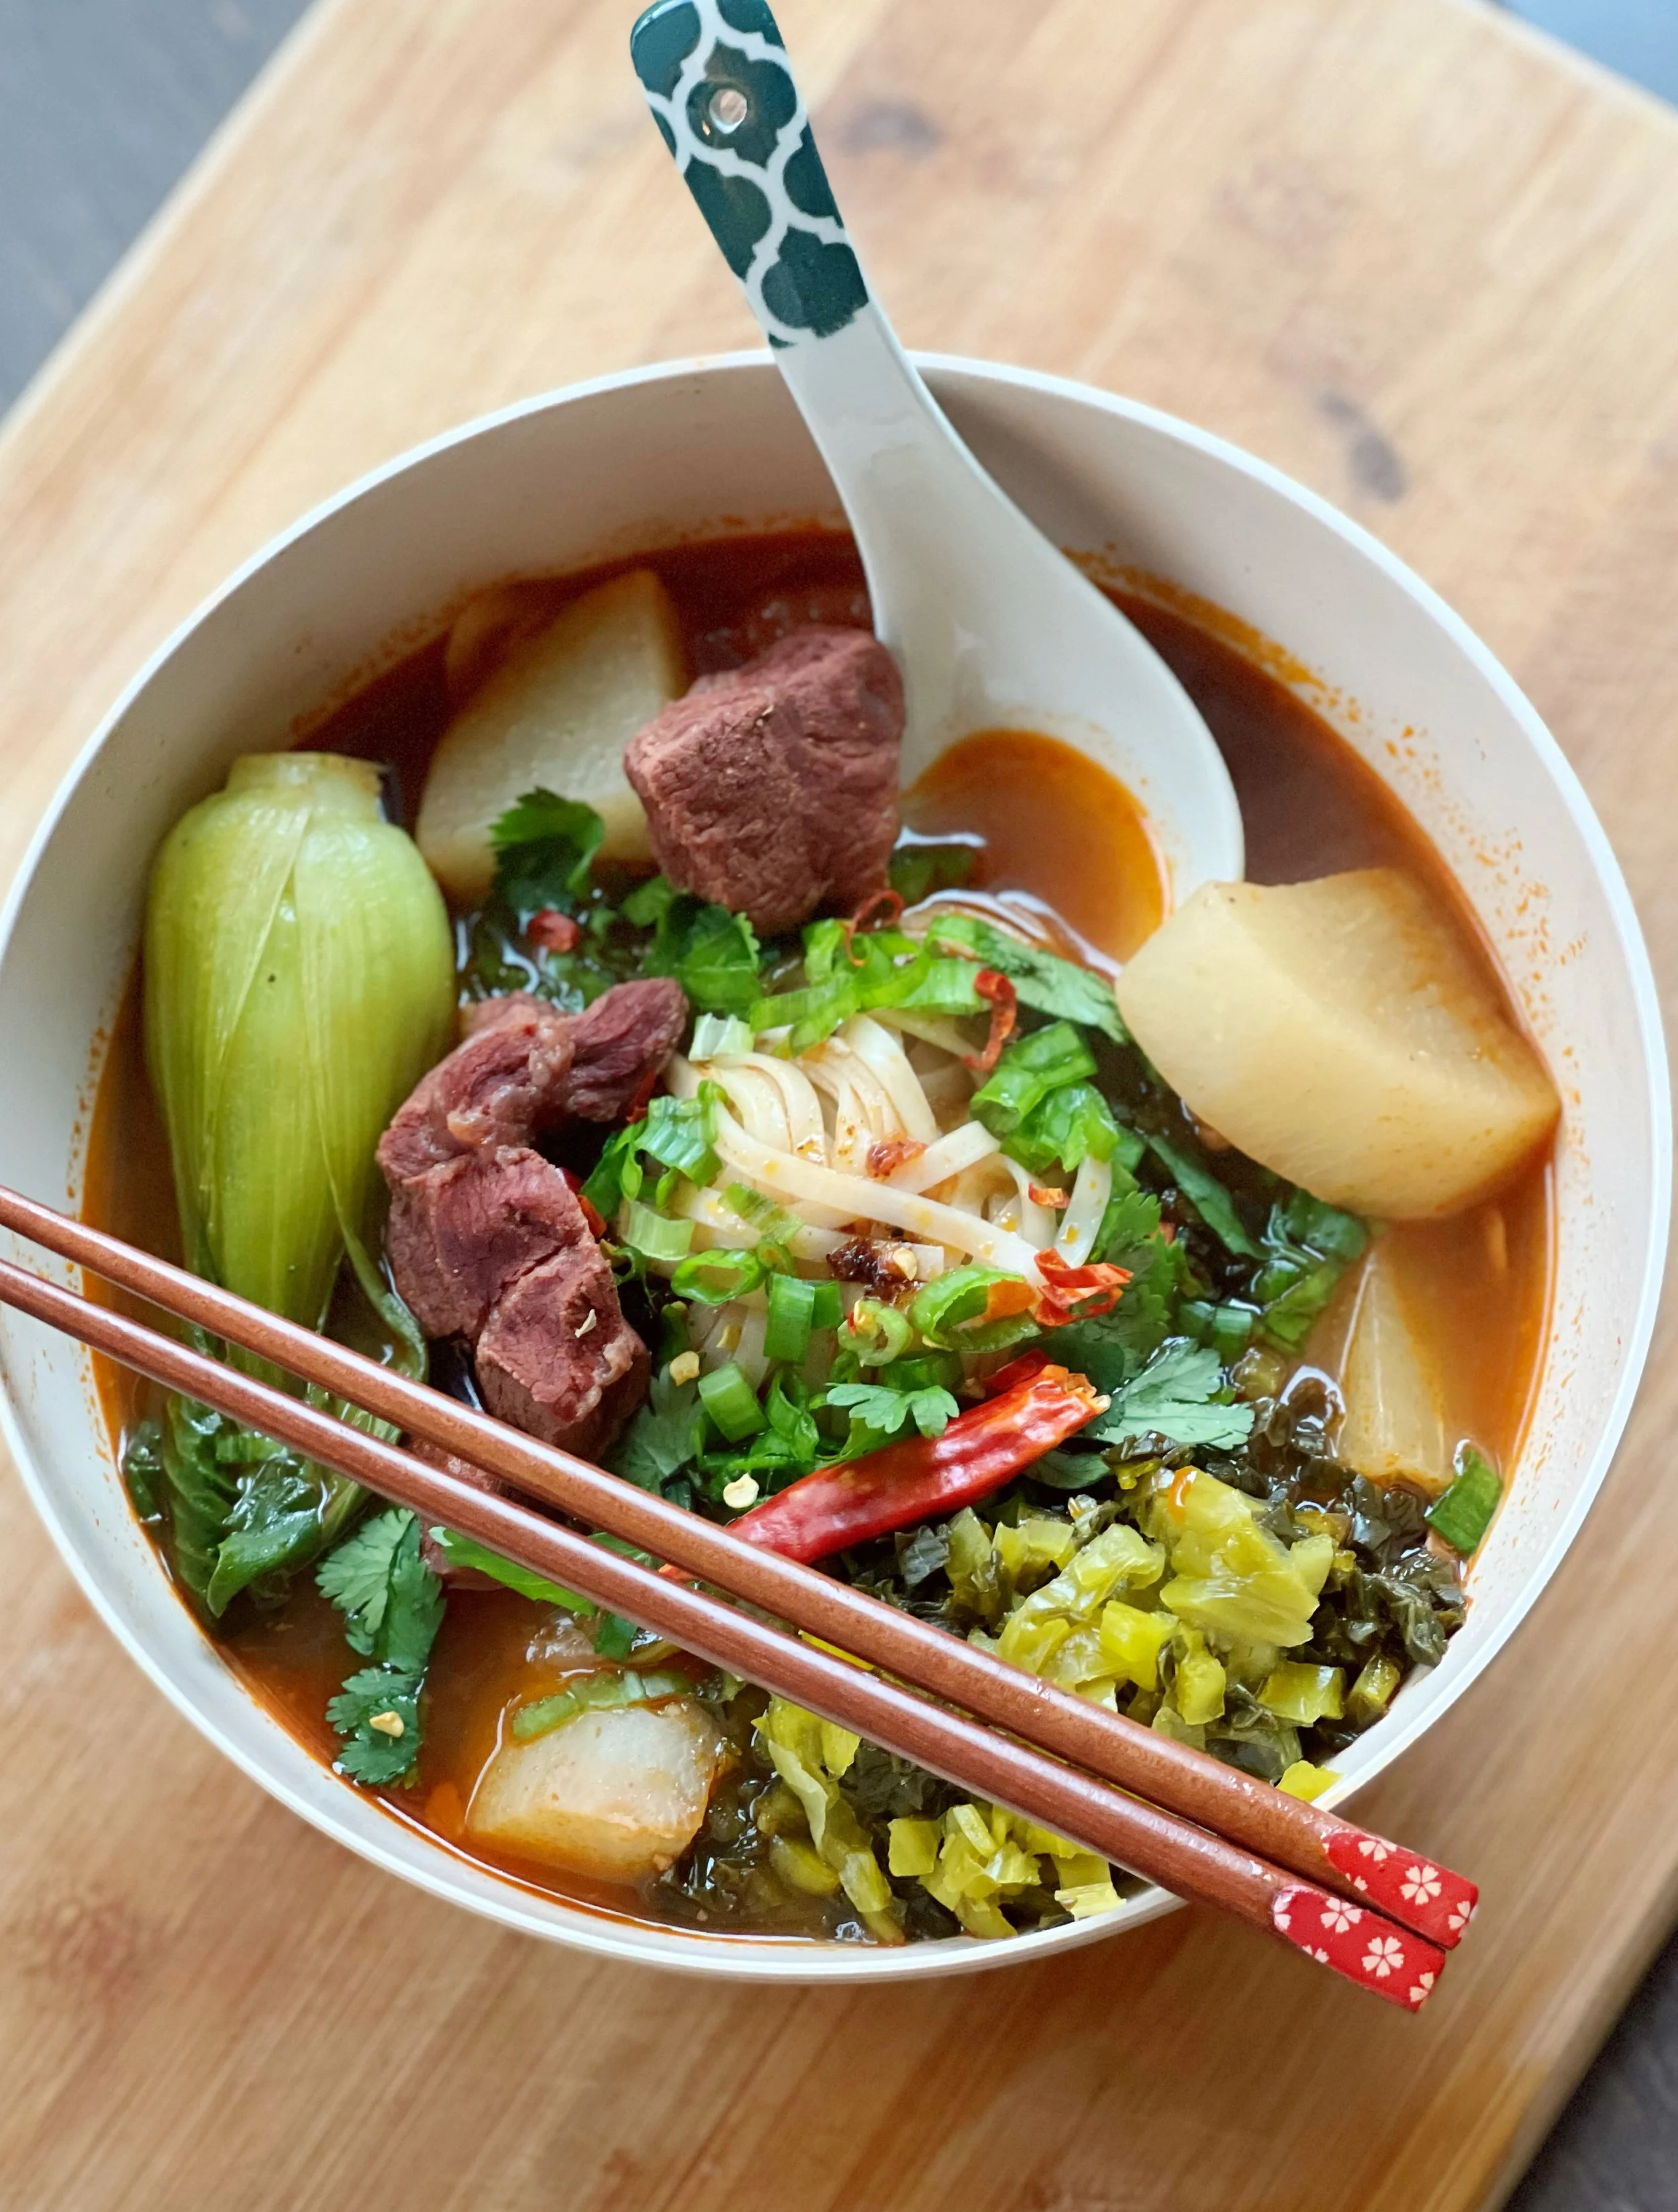
Taiwanese Beef Noodles

beef.png


Ingredients:

  • 1 (10 ounce) package dry rice noodles

  • 2 tablespoons cooking oil

  • 3 shallots, thinly sliced (or 1/2 small onion)

  • 2 whole star anise

  • 1 cinnamon stick

  • 2 tablespoons garlic, minced

  • 1 pound organic ground beef

  • 1/2 cup soy sauce

  • 1/2 cup rice vinegar

  • 1/4 cup warm water

  • 2 tablespoons coconut sugar

Directions:

Prepare a large bowl (ice bath) with 12 ice cubes and 4 cups of water, set aside.

Bring 4 cups of water to a boil in a large pot, then add the dry rice noodles and boil for 2 minutes. Remove the pot from heat and let the noodles sit in the hot water for another 2 minutes. Drain the noodles, then immediately drain them into the prepared ice bath to stop the cooking process, let cool for 1 minute. Drain and set aside.

In a mixing bowl, combine the soy sauce, the vinegar, warm water and the sugar. Whisk together well.

Heat a fry or saute pan over medium high heat. When hot, add in the cooking oil, shallots, garlic, star anise and cinnamon stick and saute until fragrant about 30 seconds. Add the ground pork breaking the meat into small pieces and cooking until the browned. Once the meat has cooked through, add the soy-vinegar mixture. Simmer for 5 minutes on medium-low heat. Serve over rice noodles.


Comment

Matcha Dipped Strawberries

Comment

Matcha Dipped Strawberries

Matcha Dipped Strawberries by Charles Chen

Matcha Dipped Strawberries by Charles Chen

Perfect for Valentine's Day or a Healthy Snack for All! Matcha has fat burning benefits, super high in antioxidants, and it looks absolutely stunning! Bring these to your next potluck and everyone will be in heaven! Sharing is Caring.

INGREDIENTS: (Makes 5-6 Dipped Strawberries)

INSTRUCTIONS:

  1. Mix Matcha Dip ingredients and Dipp strawberries, cover with favorite toppings. Place onto non-stick surface and freeze for 5 minutes and ready to eat. Keep refrigerated.


Comment

Sambucol Elderberry Lavender Cake

Comment

Sambucol Elderberry Lavender Cake

Need a guilt free desert that will hit the spot, and also help you relax ? We got you covered, plus added benefits from sambucocl berries.

charleschen.tv


INGREDIENTS

  • 1 1/2 cups salted ghee or grass fed butter

  • 1 (8 oz.) miyoko cream cheese

  • 2 cups monkfruit sugar

  • 1 Tbsp. vanilla extract

  • 1 tsp. almond extract

  • 6 eggs

  • 2 2/3 cups good quality gluten-free flour blend

  • 1/3 cup corn starch

charleschen.tv

INSTRUCTIONS

  1. Preheat oven to 325°. Spray a bundt pan or 2 loaf pans with non-stick coconut spray.

  2. In the bowl of your electric mixer, cream together the butter, cream cheese and sugar until light (medium speed -about 5 minutes).

  3. Add the vanilla and almond extracts and beat another 30 seconds to mix well.

  4. Place a sifter/sieve/strainer over a bowl. Measure the flour, cornstarch, dump into the sifter. Sift together the dry ingredients. You can repeat to sift another time or I just used a whisk and really whisked them together well.

  5. Break the 6 eggs into another bowl and set aside.

  6. With your mixer on low, alternately add the flour mixture and the eggs to your butter/sugar mixture, beginning and ending with the flour mixture.

  7. Pour batter into the prepared pan(s).

  8. Bake at 325° for 1 hour and 15 minutes or until toothpick inserted in the center comes out clean. Allow to cool in pan, then gently loosen the sides with a table knife or plastic spatula before turning over onto serving plate.

charleschen.tv

Elderberry Lavender Glaze: 

Whisk all ingredients together until lumps disappear. Add more cream if thinner consistency is desired. 

Lavender infused cream: 

  • 3 tablespoons coconut cream

  • 2 tablespoons almond milk

  • 2 teaspoons dried culinary lavender

Bring all ingredients to a light boil. Simmer on low for one minute. Remove from head and let lavender steep in milk for five minutes. Strain out lavender buds. 

charleschen.tv

Benefits of Sambucol Elderberry

Benefits. The berries and flowers of elderberry are packed with antioxidants and vitamins that may boost your immune system. They can help tame inflammation, lessen stress, and help protect your heart, too. Some experts recommend elderberry to help prevent and ease cold and flu symptoms.

Comment

7 RECIPES WHEN YOU HAVE MUNCHIES

Comment

7 RECIPES WHEN YOU HAVE MUNCHIES

I am sure you are getting TIRED of cooking the same foods, and constantly have the munchies. I got you covered with YUMMY & SIMPLE recipes! Here are my TOP 7 recipes when you have the munchies.

1. CAULIFLOWER POPPERS

These are PERFECT bite size munchies, with a nice crunch, and trust me you will need to make two batches. Super EASY to prepare! FULL RECIPE

2. VEGAN NACHOS

Who doesn't LOVE freaking nachos? I know I can LIVE on these! Here is my dairy free cheese they is UNBELIEVABLE!  FULL RECIPE

3. BLACK BEAN TACOS

These Black Bean Tacos are great for individual portions! and Simple to assemble! You can put out different toppings and decorate their own tacos! Leave out the guac and salsa! SUPER YUMMY  FULL RECIPE

4. FRESH SPRING ROLLS

For all those who want something lighter and un fried, these are colorful, vibrant, and packed full of FLAVOR  FULL RECIPE

5. STRAWBERRY WONTONS

On a sweeter note, I always like to switch it up on our taste buds, eat savory then sweet, then back :P Here are perfect little bite size wontons, and presentation looks amazing  FULL RECIPE

6. ULTIMATE QUINOA BURGERS

I know some of you LOVE bringing out the grill! YES these are fantastic burgers, with the JUICIEST consistency for you burger LOVERS  FULL RECIPE

7. RAINBOW NORI ROLLS

Watchu know about Sushi Rolls? To switch up the flavors! If you are adventurous try something NEW! FULL RECIPE

I hope you ENJOY these easy munchie recipes. Remember LIFE is about BALANCE not about restriction!

Comment

Butternut Squash with Lemon Herb Wild Salmon

Comment

Butternut Squash with Lemon Herb Wild Salmon

Baked Butternut Squash with Wild Salmon

I have been really into baking everything, as it releases so much yummy flavors. Not to mention it is so easy to adapt into a productive lifestyle. I just love the idea of all in one dishes. I bake the butternut squash in first, then add the wild salmon last 7 minutes before finishing. 

INGREDIENTS:

  • 1 piece of Wild Salmon

  • 1 Cup of Butternut Squash diced

  • Handful of Fresh Basil

  • 3 Tablespoon of Chopped Onions & Cucumber

  • 3/4 Cup of Seasonal Wild Mushrooms

  • 2 Tsp of Herb de Provence

  • Pinch of Cayenne Pepper & Pink Salt

  • Dash of Black Pepper

  • 1 Whole Lemon Cut Into Half ( Use Juice Add In Lemon for Flavor)

  • Add Favorite Gluten Free Glaze

INSTRUCTIONS:

Bake at 450, for 15-20 Minutes. Add in Butternut Squash then add in Salmon last 7 minutes. 

Comment

Paleo Bread

Comment

Paleo Bread

I grew up eating lots of bread, it was my favorite thing to go to the bakery with my mom. Thankfully I figured out a way to make gluten free paleo bread. These taste so YUMMY!!! These are gluten free, and free of yeast!

INGREDIENTS:

  • 3/4 Cup of Cassava or Almond Flour

  • 4 Organic Eggs

  • 3 Tablespoon of Psyllium Husk Powder

  • 1 Teaspoon of Baking Powder

  • Pinch of Himalayan Sea Salt

  • 1/2 Cup of Organic Apple Sauce

Top Dough with Sesame Seeds (Optional) & Egg Wash 

INSTRUCTIONS:

  1. Preheat oven at 400F

  2. Add in all ingredients into a dough, make sure there are no clumps

  3. Roll into 3-4 round buns, top with egg wash and sesame seeds

  4. Bake for 20-22 mins till golden brown, let it cool and eat!


Comment

Thai Coconut Quinoa Curry

Comment

Thai Coconut Quinoa Curry

Coconut Curry Charles Chen.jpg

Growing up my mom used to make this for me and my sister! it was such a treat, so many bold flavors, not to mention veggies with beautiful turmeric and curry spices. I made this recently at my Williams Sonoma event, and we even gave away a Green Pan Prestige Collection set that is non toxic and bpa free.

Williams Sonoma

GREEN CURRY PASTE: Ingredients:

COCONUT QUINOA CURRY BY CHARLES CHEN

1⁄2 tsp whole coriander seed (or powder)
1 tsp whole cumin seed (or powder)
1⁄2 tsp whole black peppercorns (or ground pepper)
3 small green chilies (I used serrano // stems + most seeds removed)
1 medium green bell pepper (stems and seeds removed // chopped)
5 cloves garlic, peeled
2 stalks lemongrass (tips trimmed, halved, + chopped)
1 heaping Tbsp fresh sliced ginger or 1 tsp ground ginger
6 stalks green onions (sliced // or sub 1/2 cup diced shallot per 6 stalks green onion) 1 Tbsp fresh turmeric (or sub 1 tsp ground turmeric per 1 Tbsp fresh)
1⁄2 tsp sea salt (plus more to taste)
3 Tbsp lemon juice
1 medium lime, zested and juiced
2-3 Tbspavocado oil
1 Tbsp coconut sugar

Instructions:

1. If using whole coriander, cumin seeds, and black peppercorns, add to a small skillet and toast over medium-low heat for 4-5 minutes, shaking / stirring occasionally, or until fragrant and slightly deeper in color. Be careful not to burn! If using powder, skip this step.

  1. Once seeds are toasted, add to a mortar and pestle and loosely crush. If you don't have a mortar and pestle, slightly cool the seeds, add them to a sandwich bag, and crush with a rolling pin or a heavy pan. Set aside.

  2. To a food processor (or blender with a narrow base), add green chilies, bell pepper, garlic, lemongrass, ginger, green onions (or shallot), coriander, cumin, black pepper, turmeric, sea salt, lemon juice, lime zest + juice, oil / water, and maple syrup (or other sweetener). Blend / mix until a paste forms, scraping sides down as needed. The lemongrass can be difficult to grind at first, but give it time! It's fine.

  3. Taste and adjust flavor as needed, adding more lime zest or juice for acidity, salt for saltiness, chilies for heat, maple syrup for sweetness, oil (or water) for creaminess, garlic for zing, ginger for brightness, or turmeric for more intense curry flavor.

Charles Chen Williams Sonoma

Coconut Quinoa Curry

Ingredients:
•1 Tbsp coconut oil or ghee

•1 small onion, diced
•1 Tsp of Unsweetend Coconut Flakes For Topping
•4 cloves garlic, minced
•2 Cups of cooked quinoa ( Cooked in Vegetable Broth)
•1 Tbsp fresh grated ginger (or 1 tsp ground)
•1/2 cup green & red bell pepper
•1/2 cup cherry tomatoes halves
•1/4 cup diced mushrooms
•1/3 cup spinach
•1 Tbsp curry powder
•1/2 of juice of a lemon juice
•3 Tbsp of green curry paste ( See below for Paste, made in stone mortar) •pinch cayenne or 1 dried red chili, diced (optional for heat)
•1 cup light coconut milk
•1 cup of veggie pea protein or chicken (optional)
•1 cup veggie stock
•2 tablespoon of fish sauce
•2 teaspoon of tomato paste
•Sea salt and black pepper
•handful of cilantro ( chopped)

https://www.williams-sonoma.com/products/greenpan-prestige-fry-set-8-10-in/

Instructions:

1. Make green curry paste ahead of time. Also cook quinoa in veggie broth and add in lemon grass for extra fragrance. Set aide.
2. Start with coconut oil/ghee in deep pan add in garlic, onion, and green curry paste. Cook for 3-4 minutes add in tomato paste, coconut milk. Add in pepper, fish sauce, choice of protein, lemon juice, mushrooms, green & red peppers, ginger, sprinkle cayenne.

3. Add in spinach and cherry tomatoes last, and serve with quinoa 4.Top with cilantro

Comment

Comment

What is Cryotherapy?

what is cryotherapy

Took my pro swimming buddy Luke Pechmann for Cryotherapy as we both do swim training and was getting sore. Find out benefits of Cryotherapy.

  • Cryotherapy is any treatment that involves the use of freezing up to -240 temperatures for up to 2-3 minutes. See what the expert says about some of the benefits:

Comment

Garlic Butternut Squash Noodles

Comment

Garlic Butternut Squash Noodles

Butternut Squash Pasta

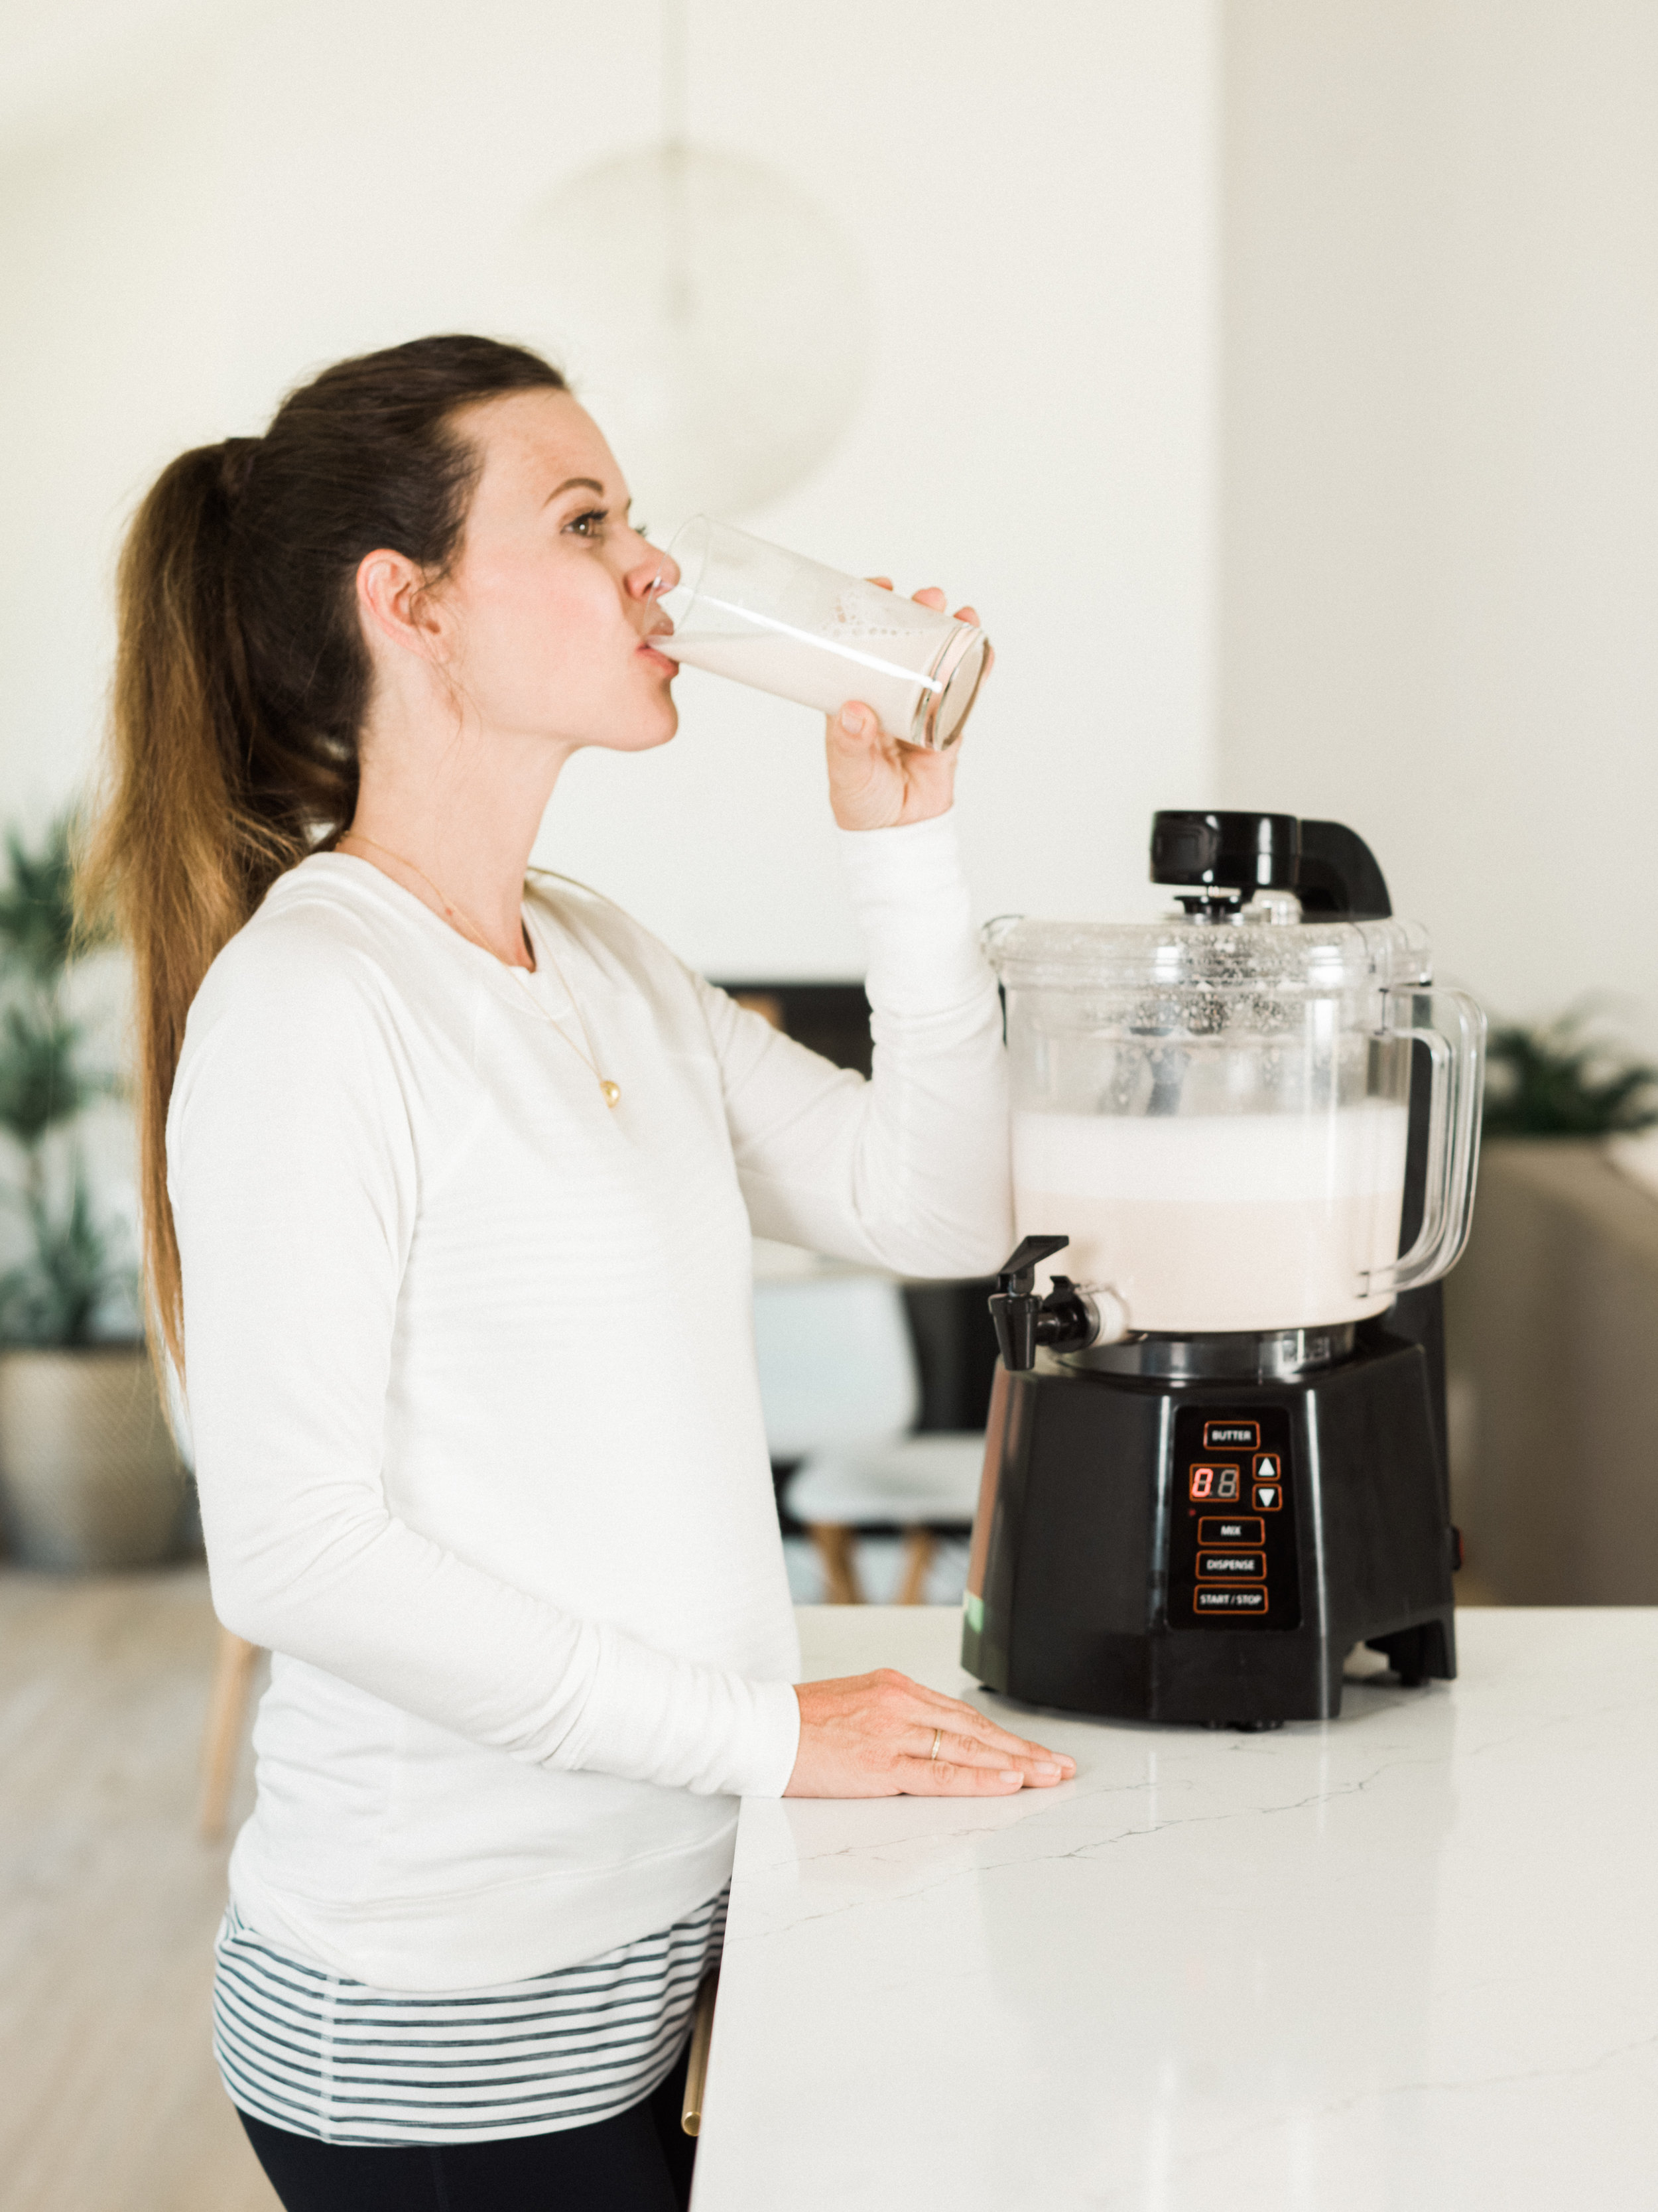
I made the yummiest Garlic Butternut Squash Pasta at Williams Sonoma! I made fresh cashew butter with Nutramilk, and made this yummy sauce. Here is my secret recipe! SHHHHHH, this sauce can be used for salad dressings, protein marinades, and more! Enjoy 

SAUCE INGREDIENTS: 

  • 1 Cup Fresh Cashew Butter made with Nutramilk

  • 2 Cups of Almond Milk

  • 1 Whole Lemon Juice

  • 3/4 Cup of Nutritional Yeast

  • 1 Tablespoon of Miso Paste

  • Pinch of Cayenne Pepper

  • 1/2 Avocado

  • Handful of Basil

  • 2 Tablespoon of Tamari or Coconut Aminos

INSTRUCTIONS:

MAKE SAUCE, STIR FRY BUTTERNUT SQUASH PASTA WITH GARLIC AND OLIVE OIL. ADD IN FAVORITE VEGETABLES, SAUCE AND SERVE WITH FRESH BASIL ON TOP

Photo Jun 09, 4 05 52 PM.jpg
http://thenutramilk.com/shop/nutramilk-nut-processor/

*Plant-based diets are here to stay and The NutraMilk makes it easier than ever to create homemade nut butters and milks.

Whether you're vegan, lactose-intolerant or just enjoy a healthy lifestyle, the NutraMilk is a great appliance and/or gift that makes up to 2 liters of pure, fresh nut milks in 12 minutes with no additives, no mess and zero waste.

NutramilkDemonstration_CF072745.jpg
CODE.jpg
Photo Jun 09, 8 50 55 PM.jpg

Comment

Comment

Jungle Peanut Butter Cake

HOLIDAYS ARE HERE!! Happy Thanksgiving! Instead of the traditional pumpkin pie I make every year, I decided I would switch it up and make a yummy PEANUT BUTTER STRAWBERRY PIE! This is a dessert that will impress all your friends and family especially the kids! ENJOY!

INGREDIENTS:

Crust

  • 1 cup rolled oats, gluten free

  • 1 tbsp raw cacao powder

  • 1 tabsp of pecans

  • 3-4 tbsp coconut nectar

  • 2 tablespoon of coconut milk

  • 1 tsp of vanilla extract

  • 1 cup almond flour

Filling

2 cup organic peanut butter, crunchy & salted
2 large ripe bananas
1 tsp vanilla extract
1/4 cup coconut nectar
1/4 cup coconut oil

Strawberry Layer

  • 1 cup strawberries

  • 1 tbsp of coconut oil

  • handful of cashews

  • 2 tsp of coconut milk

  • 3-4 tsp of coconut nectar or maple syrup

Topping

1/3 cup jungle peanuts
1/3 cup melted dark chocolate chips
2 tbsp coconut oil

cacao nibs

DIRECTIONS:


  1. Line a 9 inch round cake pan with unbleached parchment paper.

  2. Add the crust ingredients to your food processor and process until smooth. Add this mixture to the prepared lined cake pan and with a spatula press until evenly uniformed through all sides.

  3. Place the filling ingredients in the food processor and pulse until you obtain a homogenous mixture. Add the topping over the crust and freeze pie until solid for at least 4-6 hours.

  4. When ready to eat, sprinkle the peanuts over the peanut butter pie. Place the chocolate chips and coconut oil in a plate and microwave at 30 second intervals, stirring in between, until the chocolate has melted. Drizzle the chocolate over the peanuts and pie and serve.

  5. You may have to let the pie sit at room temperature for 10-15 minutes to be able to slice. Store leftover pie in the freezer and thaw for 10-15 minutes before eating.

Comment

Stillness Is The Key

Comment

Stillness Is The Key

stillness is the key ryan holiday

Took a walk with Author Ryan Holiday, you may know some of his books Ego Is The Enemy, The Daily Stoic, Obstacle Is The Way. We chat about Ryan’s latest book Stillness is the Key

stillness is the key ryan holiday

Do you check your phone first thing in the morning? Ryan Holiday shares why it’s important to have an hour of stillness each morning prior to checking emails, social media, and messages. In Ryan's new book Stillness Is The Key we discuss different pillars that help lead to a more peaceful and productive life. I sit down with Author Ryan Holiday to chat about his new book Stillness Is The Key

Ryan shares tips on:

  • WINNING YOUR MORNING

  • CREATING A STILLNESS ROUTINE

  • EGO VS CONFIDENCE

  • LEARNING TO SAY NO

  • HEALING THE INNER CHILD

  • WHAT IS STILLNESS?


Comment

VeganSmart Carrot Cake Muffins

Comment

VeganSmart Carrot Cake Muffins

Vegan Carrot Cake

INGREDIENTS:

  • 2 Tbsp Ground Flax + 6 Tbsp Water

  • 1 ½ cups Vegan Smart Vanilla Protein Powder

  • ¼ cup Almond Flour

  • ¼ cup Brown Rice Flour

  • 2 tsp Baking Powder

  • 1 tsp Cinnamon

  • ½ tsp Pink Sea Salt

  • ½ cup Maple Syrup

  • ¼ cup Almond Butter

  • 2 tbsp Unsweetened Almond Milk ( Or Choice of Nutmilk)

  • 1 tbsp Vanilla Extract

  • 1 ½ cup Shredded Carrot

  • ⅓ cup Walnuts, chopped

INSTRUCTIONS:

First, preheat the oven to 350F. Combine the Ground Flax and Water in a small bowl, stir, and set aside for 5 minutes to thicken.

  1. Add all of the Flours, Baking Powder, Cinnamon, and Salt to a bowl. Mix well, and form a “well” in the center of the dry ingredients.

  2. Pour the Flax Egg, Maple Syrup, Almond Butter, Plant Milk, and Vanilla Extract into the center of the well. Mix these ingredients together, and slowly incorporate the dry mix into the wet, until a thick batter forms.

  3. Next, fold in the shredded Carrot and Walnuts until they are evenly distributed throughout the batter.

  4. Divide the batter evenly into a greased or lined muffin tray – this will make 12 normal sized muffins or 8 jumbo muffins. Bake for 25 minutes, or until the tops are golden and a toothpick comes out cleanly.

  5. Store at room temperature for up to 4 days, the fridge for up to 7, or the freezer for one month.

Vegan Cream Cheese Frosting:

Ingredients:

  • 1/2 cup vegan butter (softened to room temperature // such as Earth Balance // butter sticks are best, not the spreadable tub // 1 stick yields 1/2 cup)

  • 1 8-ounce container vegan cream cheese (slightly softened // such as Tofutti or Trader Joe’s brand // out of the fridge for 1 hour)

  • 3 - 5 cups sifted organic powdered sugar or use Swerve ( erythritol )

Comment

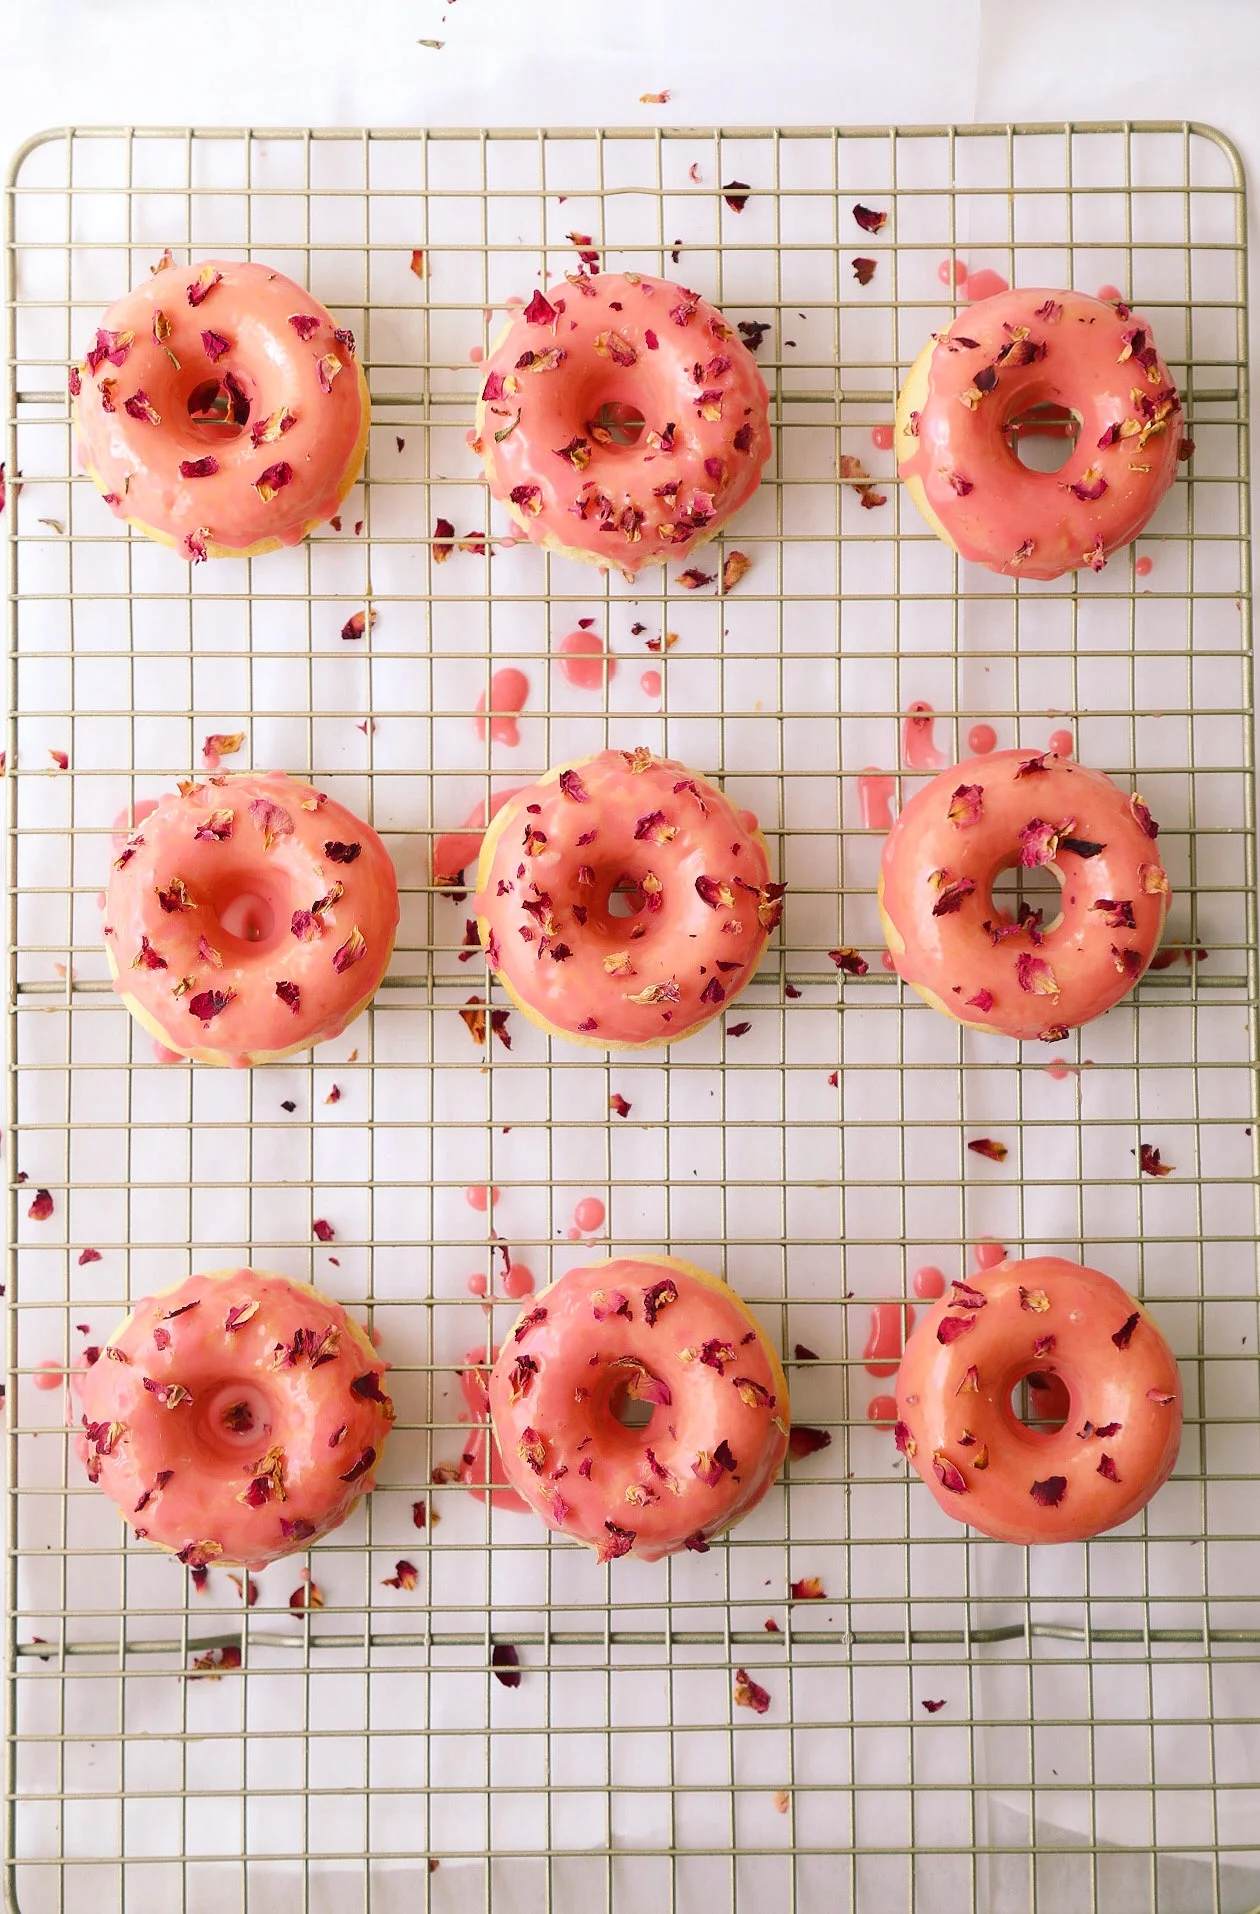
How to Make Paleo Donuts

Comment

How to Make Paleo Donuts

Paleo Donuts

Growing up I used to eat Krispy Cream donuts but I have since found a healthy switch, these are my paleo donuts that taste sooooo YUMMY! Can't wait for you to try! Make sure to subscribe and leave a comment on what you want me to make next!

DONUTS

  • 1 cup coconut sugar

  • 1/2 cup cacao powder

  • 1/2 cup coconut flour

  • 1/3 cup coconutl oil melted

  • 1/4 cup coconut milk

  • 6 large organic eggs

  • 2 tablespoons collagen powder

  • 1 teaspoon baking soda

  • 1/4 teaspoon pink salt

GLAZE

  • 1/2 cup coconut butter or almond butter

  • 1 tablespoon coconut nectar

  • 1 tablespoon earth balance

  • 1-2 teaspoons beet juice or dragon fruit

How to Make Paleo Donuts

INSTRUCTIONS

  1. Preheat oven to 350F. Generously grease a donut pan with the melted coconut oil.

  2. Prepare the paleo mix.

  3. Fill the donut pan with brownie batter. Cook on 350F for about 15 minutes (or until cooked).

  4. Prepare the coconut frosting. 

  5. Once the donuts have cooled, pour the glaze over them and then top with your favorite toppings. I used freeze dried raspberries, cacao nibs, hemp seeds, and coconut.

Comment

Worst & Best Foods For Digestion

2 Comments

Worst & Best Foods For Digestion

how to get abs
alm_esa_corps_en_fonctions_tube.jpg

With all my time traveling I was starting to feel it in my digestion. It’s not just about what we eat but rather how we digest our food. Here are some foods that are best for digestion. We can all use some help with more energy, beautiful skin, and optimal absorption of nutrients from our foods.

worst foods for digestion


WORST FOODS TO INCLUDE FOR DIGESTION:

  1. FRIED FOODS

  2. DAIRY

  3. ALCOHOL

  4. CORN

  5. TOO MUCH CAFFEINE

According to Health.com

best foods for digestion


BEST FOODS TO INCLUDE FOR DIGESTION:

  1. LEAFY GREENS

  2. LEAN PROTEINS

  3. BANANA

  4. GINGER

  5. FERMENTED VEGETABLES

According to Health.com


I find that when I drink at least a gallon of water a day I feel my best along with taking probiotic supplement and also a digestive enzymes. Not to mention lifestyle habits are just as important such as managing stress levels and getting in some meditation. What has helped you with optimal digestion?


2 Comments

Almond Crusted Tilapia Tacos

Comment

Almond Crusted Tilapia Tacos

Blog Photos 3.jpg

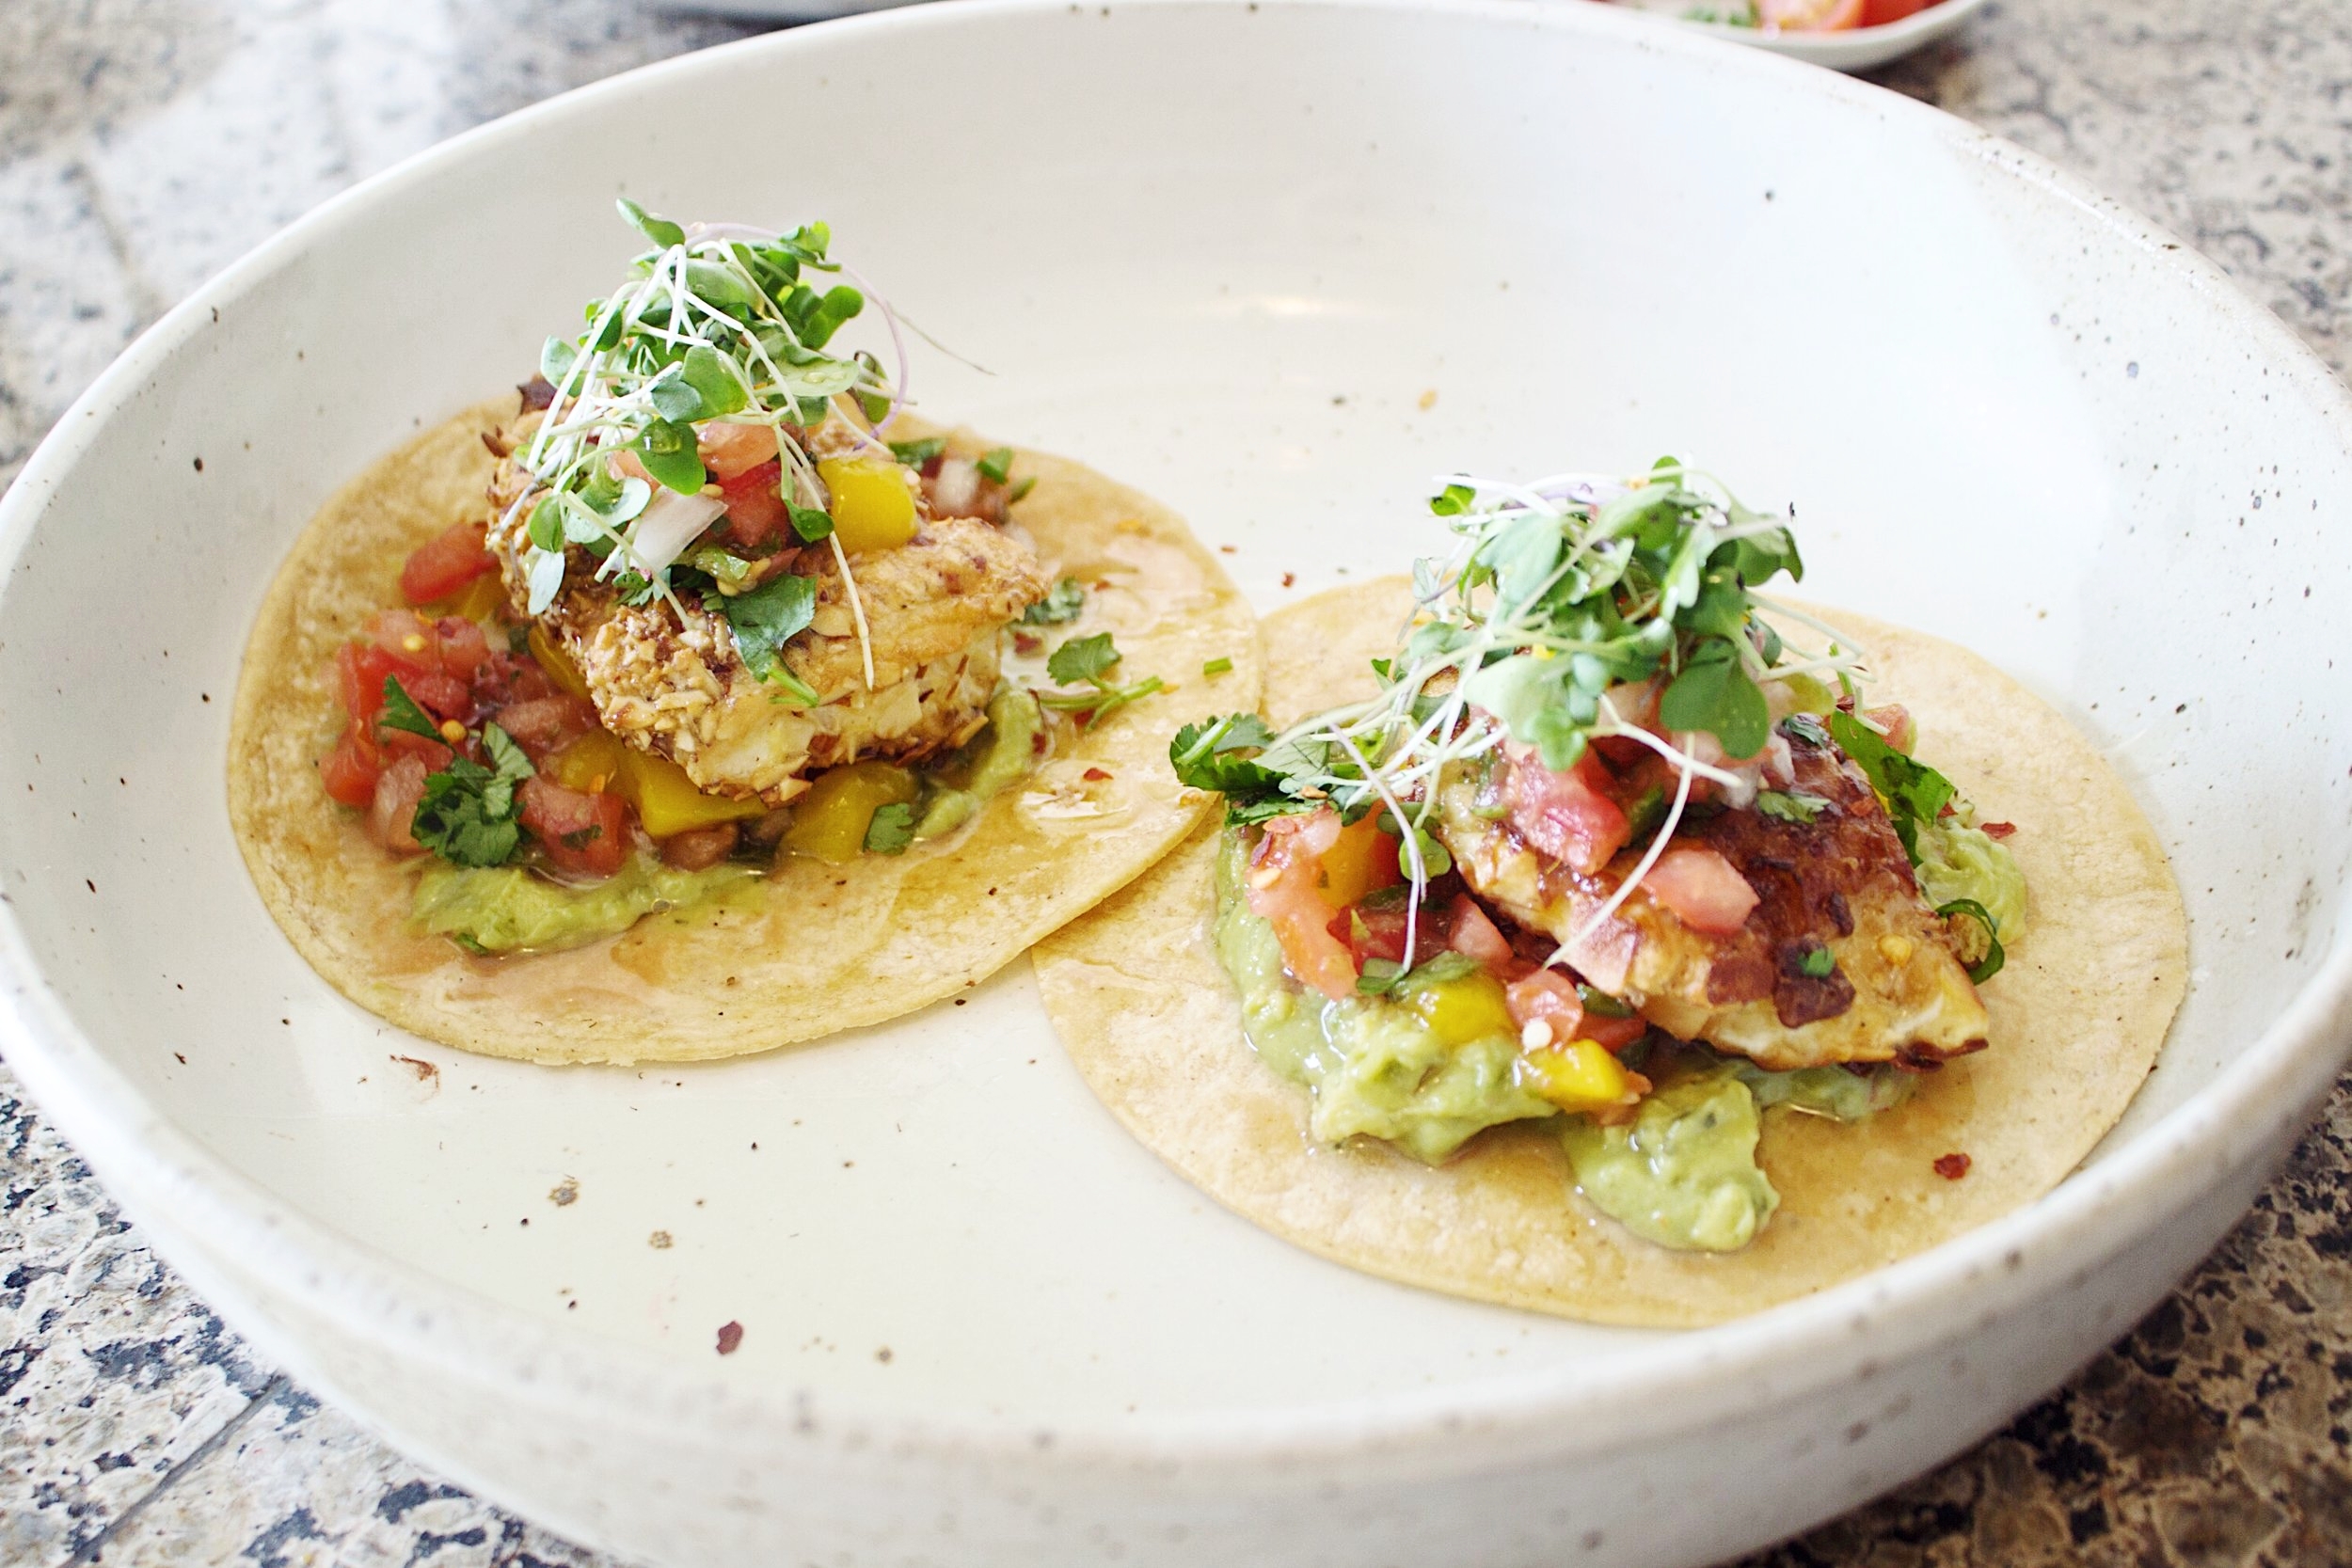
ALMOND CRUSTED TILAPIA TACOS

For all my TACO lovers out there <3 Here is my Fresh Tilapia Collagen Tacos Coated with Chopped Almonds, Spices & NeoCell Collagen to give that EXTRA full batter CRUNCH! Cooked with coconut oil, Perfectly golden crisp, and nice and moist on the inside :) FULL RECIPE BELOW

Blog Photos 1.jpg

INGREDIENTS:

TACO FILLING

  • 2 Tilapia Fillets, cut in half lengthwise

  • 2 eggs, whisked

  • 1 Tsp of Neocell Super Collagen Powder

  • 1/2 Cup Quinoa Flour

  • 1/2 Cup Almonds, chopped finely

  • 1/2 Cup Coconut Chips, crushed (optional)

  • 2 Tbsp of Coconut Oil

  • 1 Tsp of Soy Sauce

  • Salt and Pepper to taste

  • Chili Flakes

  • Corn Tortilla

  • Sprouts

MANGO SALSA

  • 1/2 Avocado

  • 1/3 Cup Mango, diced

  • 1/3 Cup Cherry Tomatoes, chopped

  • 1 Shallot, diced

  • 1/4 Cup Cilantro, chopped

  • Juice of 1/2 lemon

  • Salt and Pepper

INSTRUCTIONS:

Add soy sauce to whisked eggs in one bowl. In another bowl, mix quinoa flour, Neocell Super Collagen Powder, salt and pepper. Mix all ingredients for mango salsa in a separate bowl and set aside.

Dip both sides of tilapia fillets in egg mixture, then dry flour mix, back to egg mixture and lastly, into the chopped almonds (or coconut chips) making sure it sticks on both sides. Heat coconut oil until it is melted into a liquid. Add the tilapia fillets on medium-high heat. Cook for about 4 minutes on each side. Flip the tilapia when you see a nice brown crisp forming. 

Cut cooked tilapia fillets accordingly to arrange in a taco. On a toasted corn tortilla, spread avocado. Place tilapia fillet. Top with salsa, sprouts, and extra lemon juice. Enjoy!

Blog Photos 2.jpg

IF YOU ARE GOING TO BE VISITING EXPO WEST 2017, I WILL BE PRESENTING FRIDAY & SATURDAY WITH NEOCELL AT BOOTH #1645 SHARING NEOCELL COLLAGEN RECIPES! COME SAY HI & DANCE WITH ME

Comment